728x90
Unity 에서 Terrain 을 이용해 DEM 파일을 올리는 방법입니다.
DEM 파일은 https://earthexplorer.usgs.gov (SRTM) 사이트 가입후 원하는 지역을 다운받거나
QGIS 에서 SRTM 플러그인을 설치 한 후에 원하는 지역의 DEM 파일(확장자 tif)을 다운로드하면됩니다.
테스트한 DEM 파일은 아래 첨부합니다.
(수치표고 img 를 tif 로 변환해서 해봤는데 잘 안됨)
Unity 를 실행하고 새로운 3D 프로젝트를 생성한 후에
GameObject > 3D Object > Terrain 을 선택합니다.

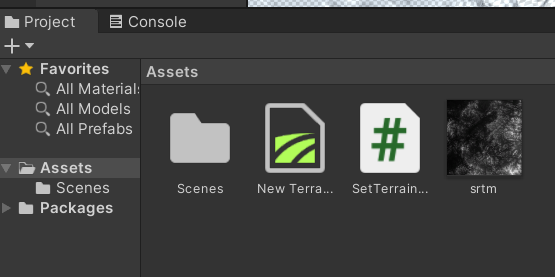
추가된 Terrain 에 Script 를 추가해야하는데 Inspector 에서 가장 아래 Add Component 버튼을 클릭해 만들어질 Script 명을 넣고 New Script 를 선택 후 Create and Add 버튼을 클릭해 Component 를 추가합니다.

추가된 Script 를 더블 클릭하면 코딩입력 창이 뜨고 아래 처럼 코딩합니다.
using UnityEngine;

public class SetTerrainHeight : MonoBehaviour
{
    public Texture2D HeightMap;

    [ContextMenu("SetHeight")]
    public void SetHeight()
    {
        TerrainData terrainData = GetComponent<Terrain>().terrainData;

        int terrainWidth = terrainData.heightmapResolution;
        int terrainHeight = terrainData.heightmapResolution;
        float[,] heightValues = terrainData.GetHeights(0, 0, terrainWidth, terrainHeight);

        for (int terrainY = 0; terrainY < terrainHeight; terrainY++)
        {
            if (terrainY >= HeightMap.height)
            {
                break;
            }

            for (int terrainX = 0; terrainX < terrainWidth; terrainX++)
            {
                if (terrainX >= HeightMap.width)
                {
                    break;
                }

                Color heightColor = HeightMap.GetPixel(terrainY, terrainX);
                heightValues[terrainX, terrainY] = heightColor.r;
            }
        }

        terrainData.SetHeights(0, 0, heightValues);
    }
}
처음 다운 받았던 DEM 파일(srtm)을 프로젝트에 추가하고

DEM 파일의 Insepctor 에서 아래 처럼 변경합니다.

다시 Treeain Component 를 선택한 후 Inspector 에서 추가된 Script 를 보면 Height Map 부분이 비어있는데 여기세 DEM 파일을 드래그하여 놓습니다.

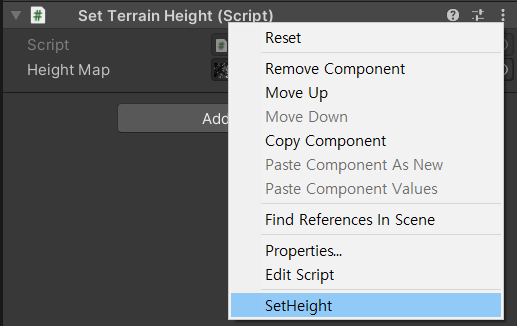
Script 의 우클릭메뉴의 SetHeight 라는 메뉴를 클릭합니다.

Terrain 에서 아래 값들을 자신에게 맞게 조정합니다.

결과


728x90
'Unity' 카테고리의 다른 글
| [Unity] 무료애셋 ultimate medieval constructor (0) | 2023.04.14 |
|---|---|
| [Unity] 무료 UI KIT - Dark Flat Fullscreen GUI Kit (0) | 2023.04.07 |
| 유용한 유니티 소스 (0) | 2022.11.30 |
| [Unity] WebGL 구현 (0) | 2022.07.27 |
| [Unity] 핵심 모음 (0) | 2022.03.04 |
